In this post I want to talk about enabling the Weblogic admin port for a Weblogic domain. The Weblogic admin port or admin port as I’ll call it, provides several benefits as it separates application traffic from administrative traffic.
By default the admin port is turned off, so all admin traffic (Admin Server > Managed Servers) and application traffic shared the same listen port, same network channel, same listen thread. Enabling the admin port for a domain creates a separate network channel and listen thread for admin traffic. Having a separate listen thread for admin traffic allows you to access a Weblogic server in the event there’s a DoS attack on the application or an application is behaving badly enough that the listening thread for that Weblogic server is unable to accept any additional requests.
Enabling the Weblogic admin port also allows you to bring up your Weblogic servers in a standby-state, allowing only administrators access to the servers over the admin channel but restricting access to any applications or services over the standard network channel.
This is ideal if you need to strictly control how your servers are managed in terms of startup/shutdown, migration, or software/product upgrades.
Understanding the Implications
Once you enable the Weblogic admin port for your domain, all administrative is forced over the admin port. Weblogic will not accept any administrative requests over the standard listen or secure listen port. So any scripts or processes that connect to the Admin Server must be reconfigured to connect using T3S and the admin port for the admin server.
Weblogic Admin Port Requirements
Configuring the admin port requires the use of SSL as the admin port will only accept HTTPS or T3S connections. Therefore you must configure identity and trust for all the servers in your domain. And if you are using Node Manager, you must configure trust for Node Manager as well.
Configuring SSL for Weblogic
You can use the included demo identity and demo trust if you simply want to play around the domain-wide admin port. The demo identity and trust are preconfigured for domains created using the Configuration Wizard.
My other blog post Configuring SSL for WebLogic shows you how to configure SSL using custom identity and custom trust with self-signed certificates.
Configuring Weblogic Admin Port
After you have SSL configured for each of your Weblogic servers, enabling the domain-wide admin port is relatively straightforward.
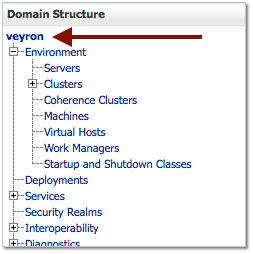
- Log into the Admin Console for your domain
- Click on the name of your domain under Domain Structure
- Enable the Administration Port by checking the box.
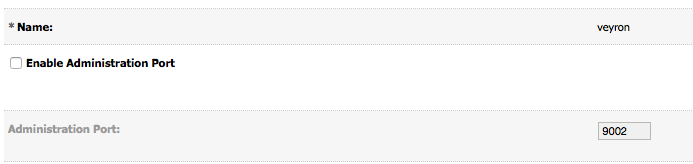
- Click Save
- You should see similar output in the domain or admin server log file verifying the admin server is now listening on the admin port:
<Jun 10, 2015 8:12:46 AM MDT> <Notice> <Server> <BEA-002613> <Channel “DefaultAdministration” is now listening on 192.168.1.165:9002 for protocols admin, ldaps, https.>
The Administration Port value is the default port number that will be assigned to each Weblogic server in your domain. If you have more than one Weblogic server on a host, then you will need to override this value under Environment > Servers > [managed server] > Advanced settings:
![]()
Once you’ve enabled the admin port, you’ll have to log back into the admin console using https://<admin_server_listen_address>:<admin_port>/console, which if you didn’t change the default is 9002.
And that’s it! Your Weblogic servers should now be accessible over this admin port. As I mentioned earlier, be sure to update any clients, scripts, processes (NodeManager even) to support connecting using t3s/https and the admin port.